
Young girls love (as in LOVE) friendship bracelets. There's something about picking out coloured threads and actually physically making a piece of jewellery that they can where that just keeps them coming back for more. Young ones will love the hands on, look-what-I-made! factor, while the older girls will be able to do what they do best - sit and chat - while they're braiding. Plus it keeps them entertained for a good while, and isn't that just what we all want?
After a few weeks of watching the younger girls struggle to plait their three little strands, or making clumsy looking knotted lengths, I decided to turn to the internet where I found this lovely tutorial for Braiding Disc Friendship Bracelets. The tutorial is very thorough with easy to follow instructions and lovely, clear pictures, as well as a video at the end. But I'll just do a recap for the link lazy :D
The Supplies:

- Sturdy cardboard (eg: cereal box)
- 7 lengths of yarn, 30-50 cm each
- scissors
The How To:
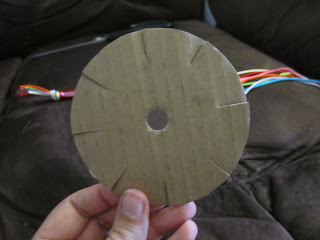
- Cut out a cardboard circle.
- Cut 8 slits, spaced evenly around the outside of the circle, and a poke a hole (with the pointy end of the scissors is fine) in the centre.
- Knot the yarn together and thread through the centre whole in the disc.
- Set up the strings by slotting them into the little cuts you made earlier. There should be one left empty.
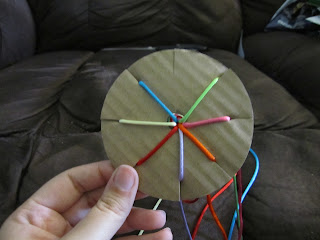
- This is where the braiding process starts: With the empty slot at the top, count down clockwise to the third string.
- Remove it from it's slot and press it into the one at the top.
- Turn so that the new empty slot is at the top and repeat until desired length is reached.


After a while the top will start looking like this:

And coming out the other side is:

Hints and Tips:
- You can use whatever kind of string/yarn/cord works for you. I've used satin cord I bought from the cheap shop for the photos here and it's looking pretty good if you want a length of rope. I've also had success with crochet cotton and embroidery floss.
- If the loose ends get tangled (which they inevitably will) hold the disc in one hand and pull the strings up and out of tangle one by one.
- Play around with the number of colours you use and the way you set them out to discover the different patterns you can make in your bracelet.
Enjoy!
No comments:
Post a Comment