 |
| Spider Owl and The (Owl) Flash |
I designed some owls that had the main features of well known superheroes in my little ideas book and decided I might like to make them out of layered paper or cardboard. Awesome idea, I know. But when I looked at my stash of coloured paper and card there was a distinct lack of the appropriate colours. Except for Iron Man (pictured below). I hadn't really I wanted to outline each piece in the black, but it became necessary when I realised that the distinction between the read of his body and the red of his wings just wasn't there.

So there is idea number one of how you could use this craft: Create paper/cardboard owls. Perhaps to put on cards?
Undeterred by this minor set back in my plan, I decided to pull out the felt, recalling the utter cuteness of the Kokeshi Dolls we'd done at work. I did up some templates for the pieces of the basic owl which can be downloaded here. This does not contain all the piecess required for the superhero owls I have made (and planned) however, many of the pieces not included can be easily drawn up yourself.
So Here's What You'll Need:

- Basic Owl Template
- Felt in assorted appropriate colours for your owls
- Embroidery threads that match your felts
- Scissors
- Cardboard
- A pencil (I use a large 6B, but you may want a white pencil for the darker colours)
- A needle
- And Fibre Fill (stuffing)
- Print and cut out the pattern pieces. You may wish to glue the pieces to the cardboard to cut them out, or you can trace around the paper onto the cardboard to make the templates.


- Trace around the templates onto the appropriately coloured felt and cut out. Remember to flip the wing piece when tracing it the second time so that neither of your wings show the trace marks. Always place the traced side down when assembling

- Place the pieces together in the formation you wish to make

- Stitch the smaller pieces onto bigger pieces and then onto one body. (For example: I stitched the bat onto the yellow background before stitchin onto the back. I stitched the "pants" piece straight onto the base and then stitched the yellow belt into both. I stitched the eye pieces together and then stitched around the outer eye when attaching it to the body.) You'll need to use a small running stitch - simply up and down - for this.
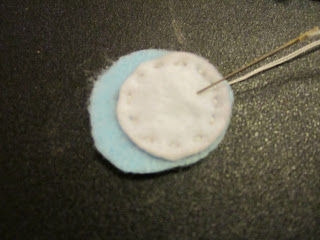

- Once the front of the owl is assembled, attach it to the back using a whip stitch. To do this you will start at the wing tip, insert the needle through all layers of felt, pull all the way through, bring the needle all the way around to the same side you started at and repeat the action all the way around the top of the owl and down the other side until you reach the other wing tip, leaving a gap between the wings for stuffing.


- Stuff the owl. Make sure to get right up into the tips. It may be useful to use a pencil or scewer to aid in this step.
- Sew the opening closed using the same whip stitch and bind off.


 |
| Bat Owl |
Aaaand here's my Avenge-Owls all Assembled!
 |
| Avenge-Owls Assembled: Captain AmericOwl, Iron Owl, Owl Thor, and Hulk Owl |
This craft would be good for a little sewing club for beginner sewing with the kids, or alter the composition slightly to make it friendlier for all children. And remember you can design your own owl characters. What about Disney Princess Owls? Or just your own owl characters all together!
Kid Friendly Alternative to Sewing the Peices Together:
Hot Glue. Yes. The faithful hot glue gun could easily be used to stick all the pieces together up to and including attaching the front to the back. Glue around the eadges of the back and attach the front by pressing it down, making sure to leave the gap. Once the glue is cool, have the children stuff it and then glue the remaining gap closed.
Remember, if you do this craft, I wanna hear about it! And see it!


